Lights of America 9265 65 Watt Fluorescent Flood Light, White

Lights of America 9265 65 Watt Fluorescent Flood Light, White


Wednesday, August 31, 2011

Folding Picnic Table Plans - Do You Need Them?

As I talked about before, I recently made an outdoor table for children. Afterwards, I view about development an adjustable table instead. While going through my woodworking plans, I came across an inviting idea: folding picnic table plans. It sounded like a good solution for anything who doesn't have a lot of space, likes to put their table away for the winter, or even wants a movable table for camping and the park. A folding table could also be good as a backup table, especially for habitancy with a lot of extended family.

Making a folding table doesn't seem too difficult. The table top is made in the same way as a customary picnic table - I could see adapting it honestly for a variety of sizes and shapes. The legs are similar as well, except you attach them in a separate way. One dissimilarity I saw was attaching the legs on one side, then creating complicated hooks on the other side. It was kind of like a tv tray. You also want legs that cross like an x with a hinge in the middle. This way, the legs can lay flat.

Picnic Table

One dissimilarity I would succeed is to make the table adjustable. That way, you can make it higher or lower depending on who you plan on sitting there. The top height I would set for adults, while the lowest could be child sized. Of course, if you don't have Kids, you could make the top setting countertop height, and then use the table for a buffet.

Folding Picnic Table Plans - Do You Need Them?

Could you make this type of table without plans? I think it's right on possible, especially if you are an experienced wood worker. However, I'd rather be safe and succeed a plan specifically for a folding picnic table. If I were to make this, I would pull out a set to follow.

Folding Picnic Table Plans - Do You Need Them?

george foreman grill reviews Black Rroxy Mirage Shoulder Bag Radar Detector Review

Build A Picnic Table - Diy Picnic Table

How excited you would be to have your friends and family compliment you on your gorgeous woodworking abilities. It is not as hard as you may think to build a picnic table that you can proudly show off at your next bar-b-que. You can build any one of these tables with one free day.


Now that you want to build a picnic table there is 3 tables to pick from with these plans.

Picnic Table

A frame table An A frame table can comfortably fit 4 adults or 6 children. They are nothing fancy about this one and they are small but they get the job done. If you have a small family and just need a place for a join of citizen then this table is the excellent edition to your yard. It provides a place to sit and enjoy a great bar-b-que with your family.

Build A Picnic Table - Diy Picnic Table

Hexagon picnic table The hexagon table plans give the selection of a small hexagon or a large hexagon table. The small hexagon table seats 6 adults comfortably and even more children. The small hexagon is great for a family. Round up the Kids and enjoy a nice meal together surface enjoying the fresh air.

The large hexagon seats 12 adults comfortably. With a hexagon table you are all seated around each other to make visiting with one someone else easy. You will be able to have evening meal with your family and friends and not have to worry about where you are going to seat everyone. There is room for everybody here.

Both sizes are made with only one angle for ease of building. You will not have to cut any angles and then try to fit it all together. It is made all with 60 degree angles.

Octagon picnic table Plenty of room for your next bar-b-que with one of these. You can pick to build a small octagon or a large octagon picnic table with these plans. The small one seats 8 adults very comfortably.

The large octagon table is a huge table that will seat 16 adults comfortably. There is sufficient room for everybody here. This is the excellent selection in picnic tables if you are the entertainer of your family or friends. All the time have a place for everybody with one of these bad boys.

Both of the octagon tables only use two angles for ease of building. 60 degrees for the table legs and 45 degrees for the table.

While you do not need to be a skilled carpenter to do this it will help if you have some basic carpentry skills. With some carpentry skills you can build any one of these in a day. Even with the large octagon table although you may need a friend or two to help shift this one into position and place in your yard where you want it. Can you smell those steaks cooking yet?

Build A Picnic Table - Diy Picnic Table

Build a Pergola Hardware Kit and Stencil Wireless Surround Sound Glee season 1, Glee season 2.

Sunday, August 7, 2011

Picnic Tables - How to Make a straightforward Lazy Susan For Your Picnic Table

How big is your picnic table? Can you seat 16 people? The new beloved octagonal and hexagonal picnic tables these days can be very large. This is marvelous because you can seat so many of your family and friends. And big is beautiful!


There is one small drawback any way to large tables and that is you can't reach the food or drinks in the centre or the other side of the table without having to stand up and stretch over all things else.
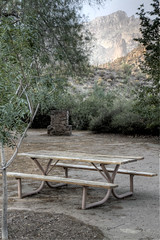
Picnic Table

The solution: A Lazy Susan! The Chinese use them extensively in their banquet rooms where the tables are also large. It is a simple retort to a frustrating challenge.

Picnic Tables - How to Make a straightforward Lazy Susan For Your Picnic Table

They can be purchased but it may not match up with the table that you have, especially if you have made the table yourself. If you have made yourself a large octagonal picnic table with octagonal segments in the table top, it would be great to have a matching Lazy Susan.

The following is a plan to match an octagonal picnic table with a table top measuring around 6'8" over to the parallel sides.

Materials required for a large octagonal picnic table

Lumber

1/2" Plywood 50"*50" quadrate favorable for covering use.

6*1 1/2 32' dry pressure treated pine

2"*4" 13' 2*4" dry treated pine

Nails / Screws

3" gal nails 32

1 1/2" screws 128

Turntable swivel A 12" to 14"

Tools Required

1) A Power compound miter saw.

2) A circular saw

3) A Drill and hole saw to make the hole for the umbrella.

4) Hammer.

5) Tape measure. Small hand plane. Adjustable square. Pencil.

6) Battery Drill to screw all the screws in.

Step by step construction

Step 1

Cut the 2*4 accurately in half with the circular saw. This now gives you 2 pieces 2"*2".If you have an electric plane, plane the saw cut. Now cut the 8 pieces to 19" with 45 degree angles. This is the covering frame.

Make sure that the cut side is down so that the saw cutting is not visible.

Step 2

Arrange the pieces on a flat covering in an octagon shape and nail them together.

Step 3

Place the frame onto the plywood board and accurately part angle to angle until you get the frame perfectly "square". When you have it exactly right draw a pencil line right around the inside of the frame onto the plywood. (Note. If there are any gaps in the covering corners of your frame you may need to do some minuscule adjustments because this is what you are going to see.)

Step 4

Shift the plywood onto a bench and cut accurately along the line with the circular saw. Tidy up with the hand plane. You now have a perfect octagon to fit exactly inside the 2*2 frame. Place it inside the frame on a flat covering and rule lines between the opposite corners onto the plywood

Step 5

Now part each board, cut and fit the covering row of 6*1 1/2. Plane the cut edge to give it a bevel. Don't nail anything. When the covering row is perfect start on the next row and then the next until all the centre is filled. You will need to be strict with cuts to make sure it all fits with no gaps.

Step 6

Nail 2 nails straight through each section of frame into the covering row of 6*1 1/2. Now turn the Lazy Susan over. Draw lines between the corners. Take a piece of 6*1 1/2 to use as a guide and draw where the boards would be on the other side. Do each board in turn because this gives you a guide as to where to put the screws.

When you know where all the screws go, screw the plywood tightly to the Lazy Susan top. In this way there are no nails or screws showing on the Lazy Susan top.

Step 7

Turn it over so that it is right way up. You should clearly see where the centre of the umbrella hole goes. Use the hole saw to make the umbrella hole.

Step 8

Centre the turntable swivel accurately and screw into place.

You now have a Lazy Susan to converyance your food and drinks effortlessly around your large octagonal table.

Picnic Tables - How to Make a straightforward Lazy Susan For Your Picnic Table

Insulated Tote Bags